In the last ten years kombucha has really grown in popularity! And for good reason, this probiotic beverage has numerous health benefits. The best part is you can successfully brew kombucha right in your own home!
This post may contain affiliate links.
A Daily Cup of Kombucha explains the health benefits of making this beverage part of your daily health regimen.
Brewing made Simple!!
Brewing your own kombucha with simplicity is very fulfilling!
Have you already fallen in love with this effervescent probiotic drink? Great decision to save money and brew your own right from your home! Plus I have found most people prefer the homemade brew due to the taste being less vinegary.

Once you acquire the necessary supplies you can begin right away. The best way to acquire a culture and starter is from a reliable friend. I have gifted numerous cultures over the last 8 years! My first culture and starter were a gift from my husband! It is so fun to share a SCOBY!
You will want a culture that is healthy and clean.
What materials do you need to begin making your own brew?
- 1 gallon glass jar and/or 2 – 1/2 gallon jars 2 Pack ~ Wide Mouth 1 Gallon Clear Glass Jar – White Lid with Liner Seal for Fermenting Kombucha
- stock pot
- muslin or cheesecloth (Cut to fit over the top of your brewing container with some overlap.)
- A large elastic band to secure the material on the container & keep flies out.
- 1 gallon of filtered water
- 6 tea bags; organic black, green or oolong tea. Order tea bags here.
- 1 c. organic unrefined cane sugar
- 1-2 healthy kombucha cultures or SCOBY. (I bought mine from Organic-Kombucha.com).
- Approximately 1 c. kombucha starter
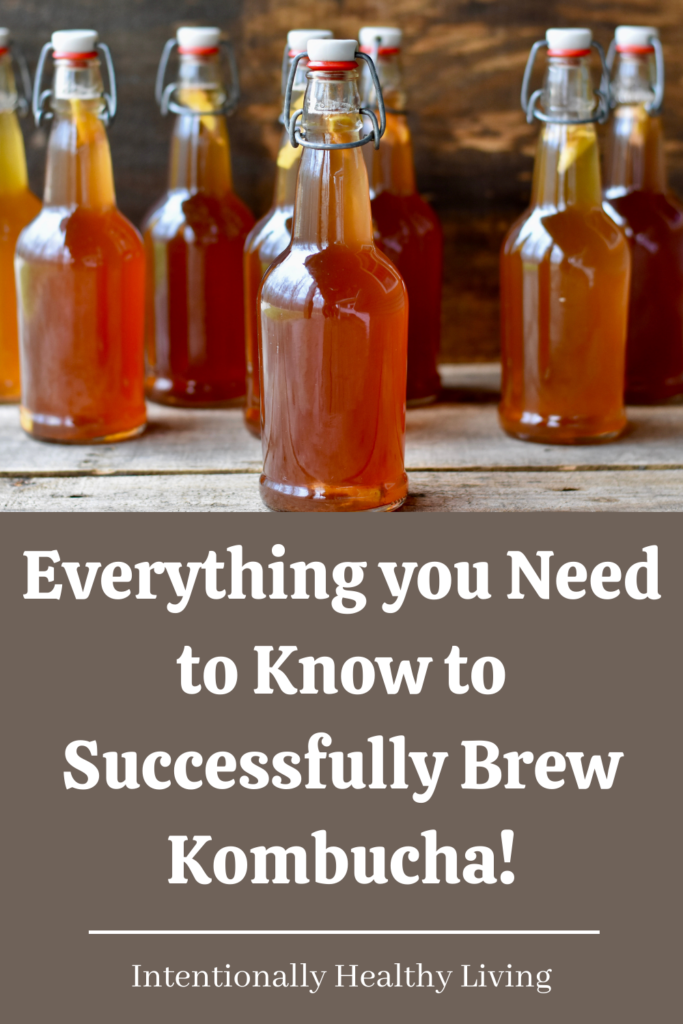
- Suitable bottles with caps for storing fermented tea.
- 1 cup measuring cup
- pH Strips – these are optional, but as a safeguard I test the pH of my brew each time the seasons change. pH Test Paper for Kombucha Brewing, 0.5 to 5.5 pH [16 Foot Roll with Dispenser]
Contact Intentionally Healthy Living to order your culture & starter today.
Flip-Top Home Brewing Bottles:
Amazon: Home Brewing Glass Bottle with Easy Wire Swing Cap & Airtight Rubber Seal -Amber- 16oz – Case of 12
Amazon: EZ Cap bottles 1 L (33 oz.) Amber Flip Top Bottles (Pack of 12)
My preferred Tea for Brewing:
Amazon: Prince Of Peace Organic Oolong Tea-100 Tea Bags net wt. 6.35oz
Brewing Directions:
- In a stock pot, add one gallon of filtered water and one cup of organic cane sugar. Bring the sugar and water to a boil on your stove top. Once it begins to boil, allow the water to simmer for for 10 minutes.
- Remove from the heat and add 6 tea bags. Organic tea is recommended to keep your tea pure. Let the tea bags steep for 10 minutes.
- Remove the tea bags from the pot. (I place my tea bags in my compost.)
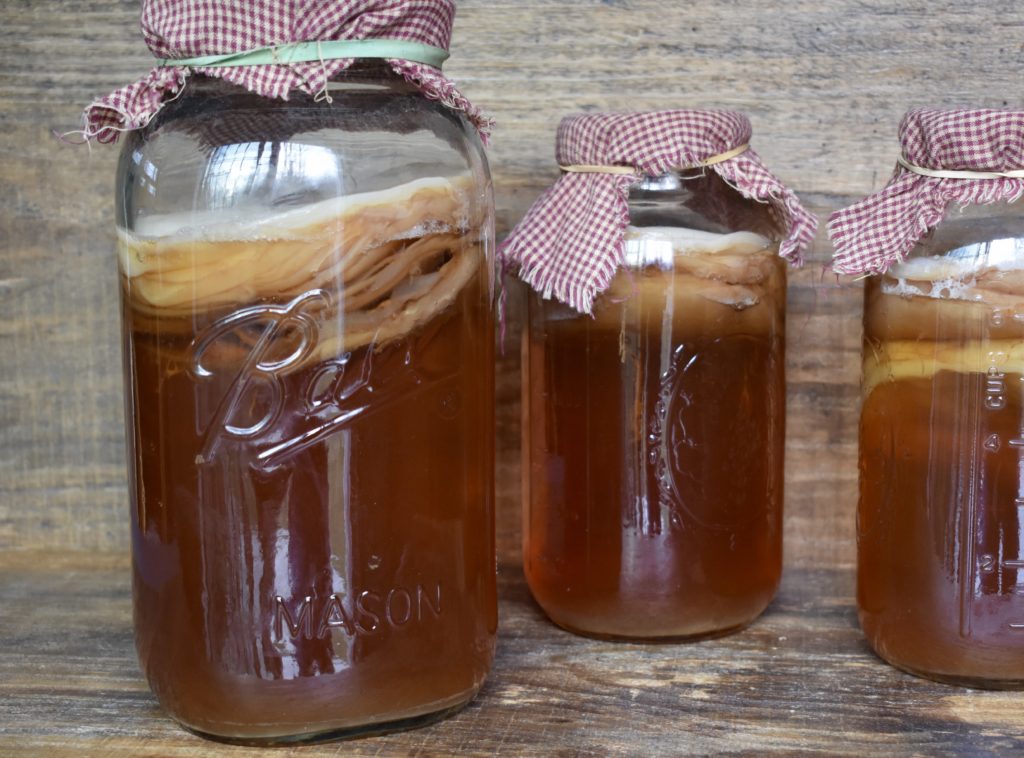
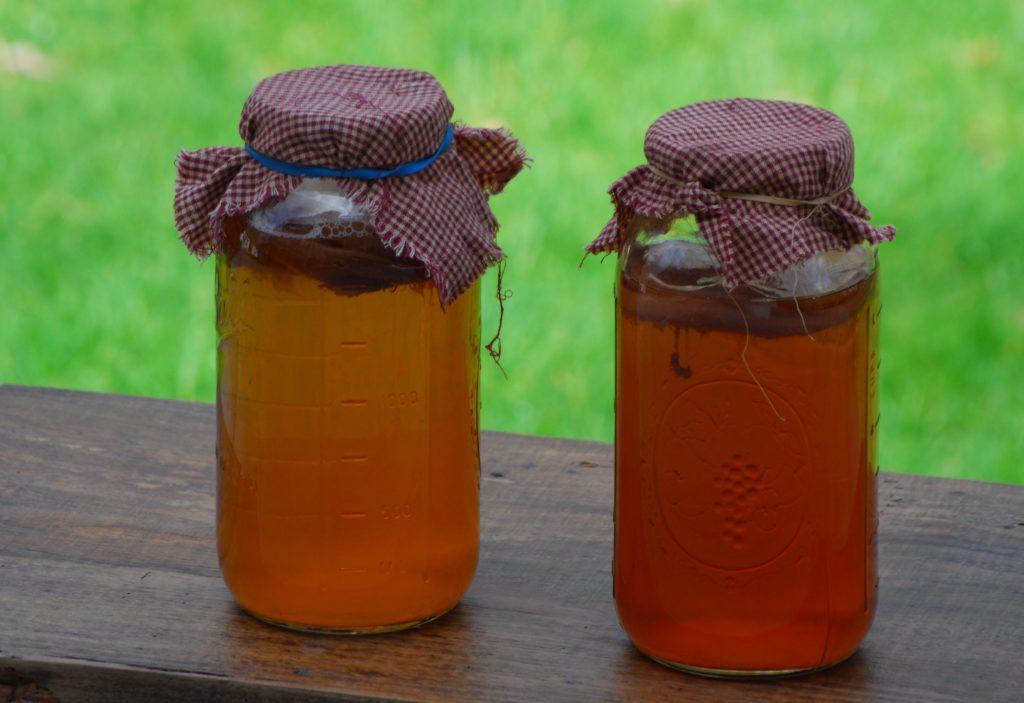
- Let the mixture cool down to room temperature. Wash your hands, rinse thoroughly, and dry them on a clean towel. Once the mixture is cool, add your tea mixture to your glass gallon container. Add in 1 c. of kombucha starter. Gently add the SCOBY or culture to the top. Make sure the side that is clearer or white goes on the top.
- Cover the glass container with a clean cotton cloth or cheesecloth. Secure with a rubber band.
- Place your jar out of direct sunlight but where it can still get air flow. I place mine on the middle shelf of my pantry. Allow it set for 7-10 days depending on the room temperature and air flow. A new SCOBY or culture will begin to grow on top of the mixture.
After 9-10 Days
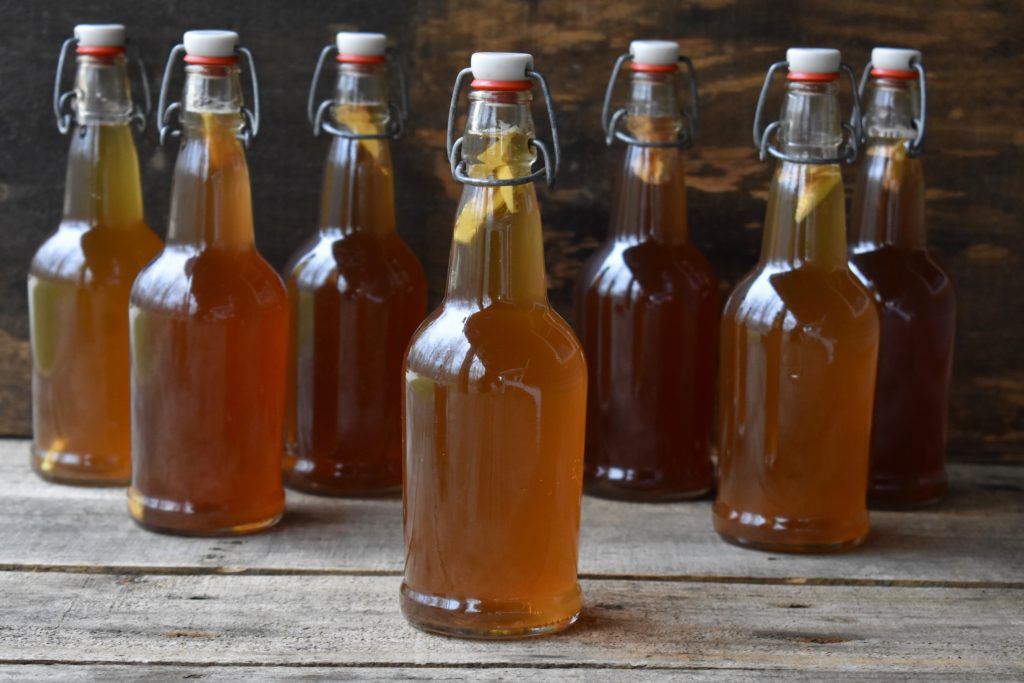
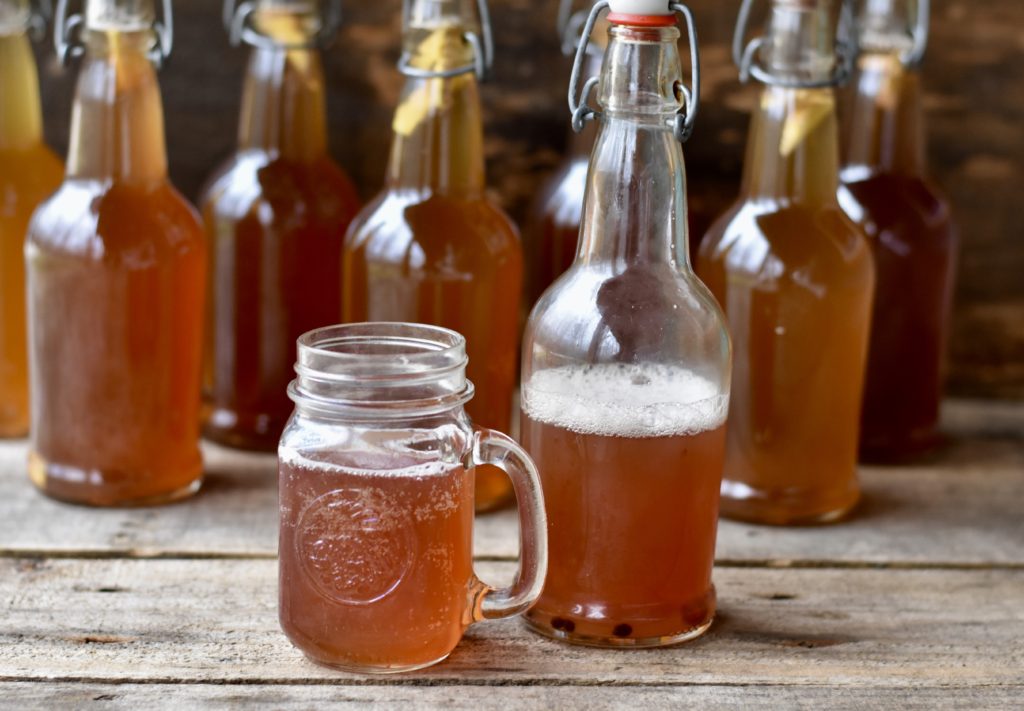
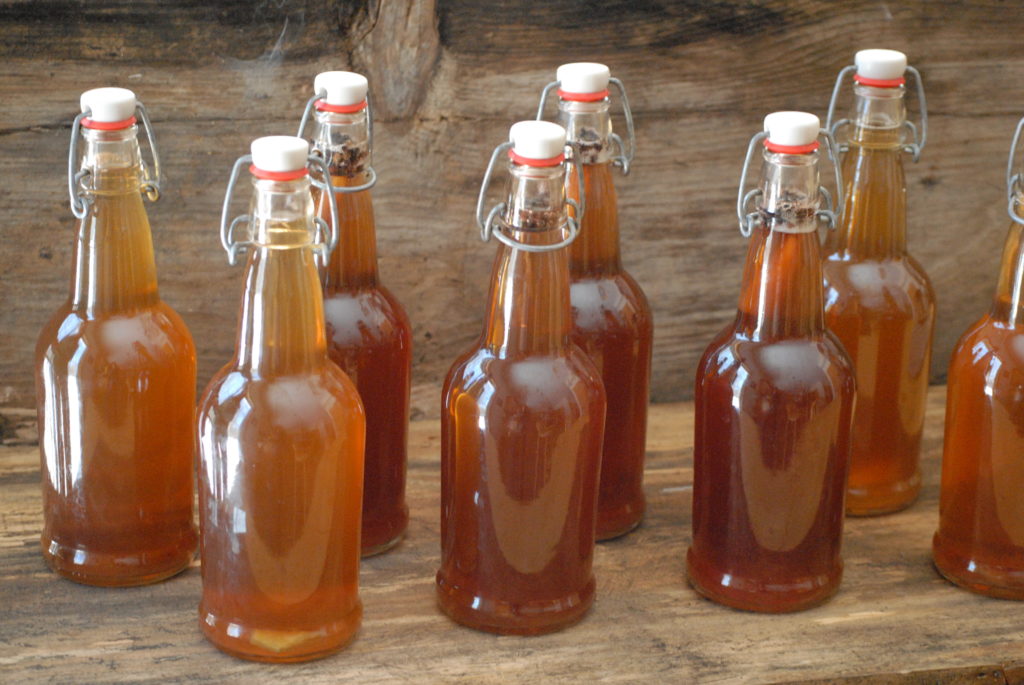
- After 9-10 days you can process your kombucha (KT). Bottles or flip top bottles can be cleaned using hot water and vinegar. (It is best to stay away from soap to insure that no residue is left in the jars.
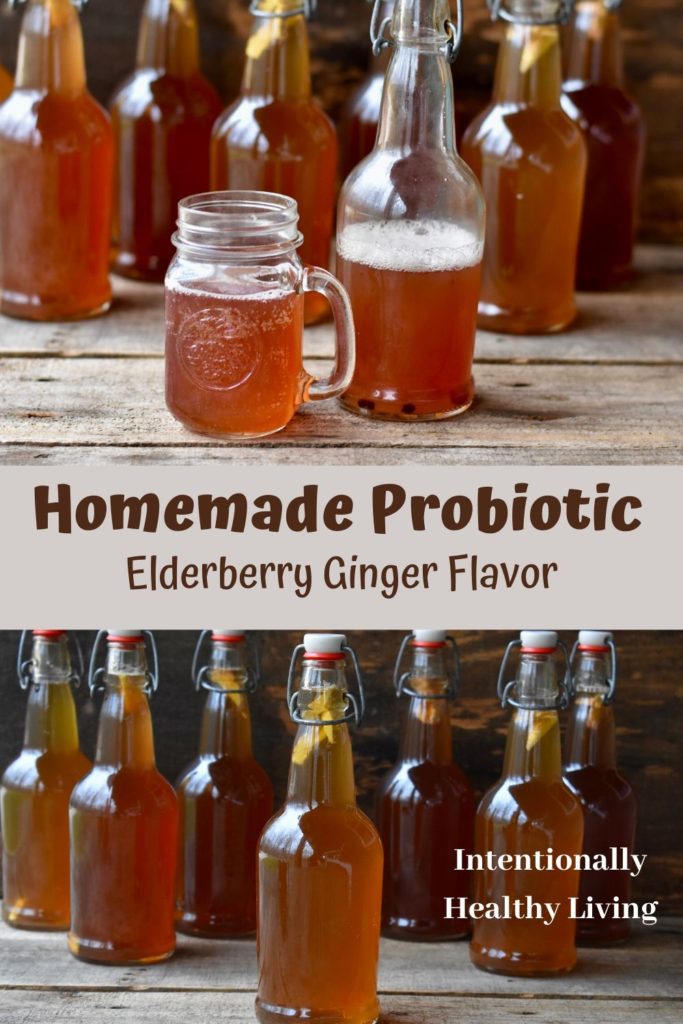
- Flavoring your Kombucha is fun! Here are a few suggestions for you; fresh ginger, blueberries, dehydrated elderberries, lemon, raspberries, hibiscus, and strawberries. Place your flavors in the bottle before you begin the processing.
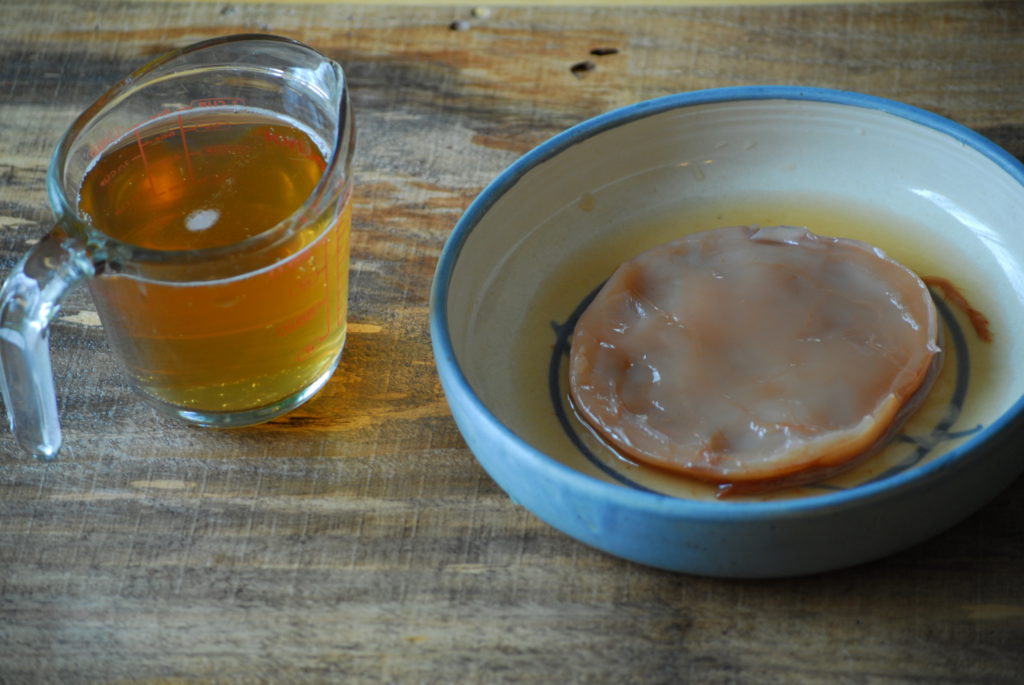
- Next, gently remove the SCOBY to a bowl and set it aside for your next batch. (REMINDER, wash your hands, rinse, and dry on a clean towel.)
Second Fermentation
Once my bottles are full, I place them in the pantry for another 3-7 days for a second ferment. After the desired ferment, I place them in the refrigerator. Once the KT gets cold, the fermentation process will stop. KT can last in the refrigerator for up to 6 months. Enjoy!!!
You are now ready to brew another batch!!! It is important to have clean jars and bottles, however you do NOT want any soap residue. So to avoid any residue or oils left from soap, I prefer to clean my jars with white vinegar and hot water.
I place the starter in my clean gallon (or half gallon) container, add a fresh batch of brewed sugar/tea, place a SCOBY on top, cover, and place in the pantry. I brew approximately 1 gallon of KT per family member.
Successfully Brew Kombucha at Home
Brewing your own kombucha can be intimidating. It is really a process you just need to dive in and try. Remember if you do not like a batch or you have any questions about it, just save out 1 c. of starter, 1 Scoby and begin the process again. After you have brewed a few batches your confidence will build. You will know if a batch is done to your liking simple by the smell!
I am excited for you to begin brewing your own at home! The savings and rewards are worth it!
Please contact me if you have any questions with the brewing process. I would enjoy hearing from you; what flavors do you like?
Pursing Better Health Together,


Trackbacks
-
-
[…] During the summer months, I brew sun green tea or herbal tea on the deck. Hibiscus tea is a favorite, as it naturally relaxes! We even replaced orange juice with home brewed Kombucha tea. A glass of effervescent ginger kombucha……. what a refreshing way to begin the day!!! Simple recipe for brewing Kombucha from your home. […]
-
[…] you are ready to brew your own Kombucha: Successfully Brewing Kombucha will set up with a list of supplies and easy to follow […]
[…] is very minimal and brewing is easy to do. If you would like detailed instructions visit Successfully Brewing Kombucha. I will encourage you try your own […]